
How to Play Dazzle in Dota 2: Pro Tips and Tactics
Dazzle is one of the most distinctive support heroes in the game. He protects teammates with precise timing, lowers armor, heals in bursts, and deals physical damage through his spells. His kit gives him presence in every stage of the match, whether played as a hard support or as a damage-focused core with the right items. Learn his abilities, playstyle, item builds, and strategies for support and core roles with this complete guide to Dazzle in Dota 2.
Understanding Dazzle’s Playstyle
Dazzle functions as a support who keeps teammates alive in the most dangerous moments. His famous spell, Shallow Grave, prevents allies from dying for a short time. Paired with Shadow Wave and Poison Touch, he can save teammates while pressuring enemies with physical damage.
He does not rely on items to stay useful. Most of his strength comes from timing, positioning, and the way his abilities interact. Because of this, Dazzle contributes even when he is low on gold.
At the same time, he is fragile and has no reliable hard disable unless he buys one. Staying alive matters more for Dazzle than for many heroes, because a single missed spell can decide a fight.
Strengths and Weaknesses
Dazzle excels at saving teammates in clutch situations. His mana costs are manageable, his abilities have short cooldowns, and his impact remains high even without expensive items.
He can contribute in many roles, from hard support to mid-lane core. His physical damage spells give him an aggressive edge, letting him pressure carries in lane and discourage early dives.
He struggles when the enemy team has strong silences, burst damage, or displacement. His low health makes him easy to kill. He also depends heavily on his team; he cannot win fights alone and needs allies to follow up after his spells.
Playing Dazzle Aggressively
Early Harass and Lane Control
Dazzle has a strong attack animation and solid base damage. Poison Touch gives him a spammable slow and physical damage-over-time effect. Against melee heroes without a dispel, this spell forces them to back away or take repeated hits.
A common approach is to level Poison Touch early when contesting the enemy carry’s farm, especially if your own carry can play safely without much help. Once the spell reaches max level, the long duration and refreshing mechanic let you chase down low-armor heroes with consistent pressure.
When enemies approach for last hits, you can cast Shadow Wave on yourself or an ally standing near them. This deals physical damage around the healed unit and denies last hits while chipping at their health. With good timing, this creates strong lane control.
Buying a Blight Stone early increases your physical damage and amplifies all the damage from Poison Touch and Shadow Wave.
Rotations and Ganks
Poison Touch becomes a threat once maxed out due to its long duration, slow stacking, and ability to keep enemies from blinking. Smoke rotations toward the mid lane or vulnerable side lanes become viable. Adding Medallion of Courage or using Bad Juju armor reduction during these rotations increases kill potential.
Be careful against heroes with dispels like Oracle, who remove Poison Touch immediately. If the enemy has these tools, committing too many points into Poison Touch can slow your early impact.
Dazzle as a Core Hero
Why Mid Dazzle Works
As of version 7.34, players often pick Dazzle as a mid-laner. The main reason is his Aghanim’s Scepter upgrade. It allows Shadow Wave to bounce to enemies as well as allies, dealing increased physical damage and triggering instant attacks from Dazzle.
Because he is a Universal hero, any attribute item increases his attack damage. This pairs perfectly with the Scepter upgrade, turning Shadow Wave into a burst tool that can clear creep waves, pressure towers, and deal heavy damage in fights.
Mid-Lane Build and Play
A standard mid build includes:
-
Bottle for sustain
-
Power Treads
-
Early stat items like Bracer
-
Fast Aghanim’s Scepter
Once the Scepter is online, Shadow Wave becomes both a farming tool and a fight opener. The instant attacks from each bounce apply on-hit effects, increase armor reduction through Bad Juju, and make it unsafe for enemies to collapse on him.
Pair this with Shallow Grave, and Dazzle becomes very difficult to kill. He can dive with his team, deal damage, and force long fights where Bad Juju stacks reach high values.
![]()
How Dazzle’s Abilities Work
Poison Touch
Poison Touch deals physical damage over time, slows enemies, and refreshes its duration each time Dazzle attacks the target. Multiple casts stack independently, and each new instance continues dealing damage.
The spell is strong for harassing, chasing, and interrupting Blink Daggers. The shard upgrade adds a hex on hit, which destroys illusions and disables mobility.
Shallow Grave
Shallow Grave keeps an ally at 1 health for up to five seconds. Healing received during this time is amplified based on how low the target’s health is.
The timing of this spell is important. Casting too early wastes its duration, but casting too late risks the ally dying before the spell finishes its cast animation. Because of this, Dazzle players must anticipate burst damage and position carefully.
Grave also enables tower dives and escape plays. A Graved ally can teleport safely unless the enemy has a way to interrupt the channel.
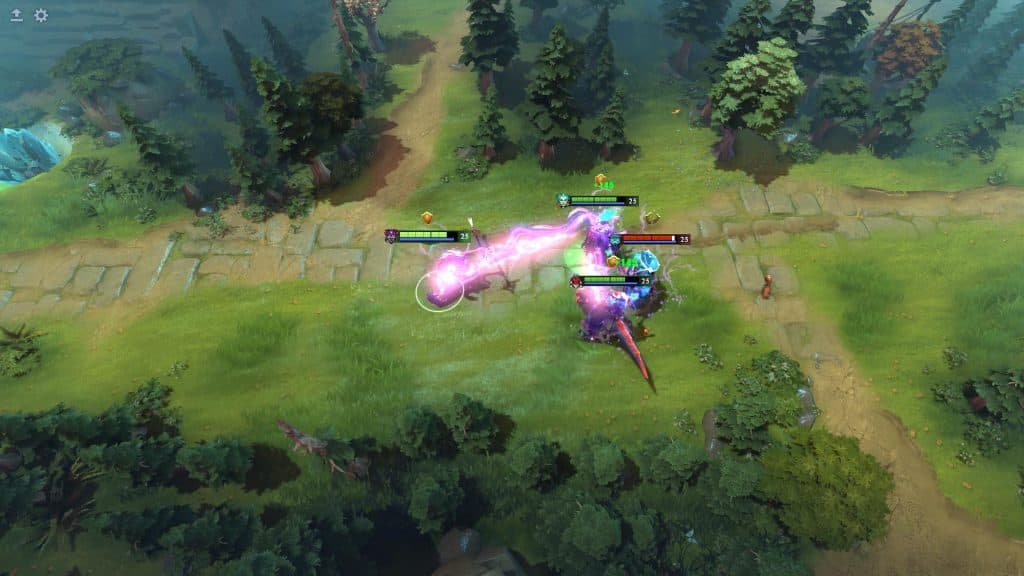
Shadow Wave
Shadow Wave heals allies and damages enemies near each healed target. When cast on units grouped tightly together, the damage stacks. Casting it on yourself while standing next to an enemy can produce multiple hits at once.
With Aghanim’s Scepter, Shadow Wave becomes a damaging spell against enemies, bouncing between them, dealing increased damage, and causing Dazzle to instantly attack every target struck. This creates high burst potential against clustered opponents.
Bad Juju
Bad Juju passively reduces enemy armor and increases allied armor whenever Dazzle’s spells hit targets. It encourages frequent casting and long fights.
The active portion reduces cooldowns of Dazzle’s other abilities at the cost of his own health. The health cost increases with each use but cannot kill Dazzle, allowing him to cast even at 1 HP.
Fights become more favorable the longer they last, as enemies accumulate armor reduction stacks.
Itemization for Support Dazzle
This section uses bullet points as allowed.
Starting Items
-
Tango
-
Healing Salve
-
Iron Branch
-
Clarity
-
Observer Ward
Early Game
-
Magic Stick
-
Boots of Speed
-
Urn of Shadows
Mid Game
-
Magic Wand
-
Arcane Boots
-
Solar Crest
-
Mekansm
Late Game
-
Spirit Vessel
-
Guardian Greaves
-
Lotus Orb
Situational Support Items
-
Sentry Wards
-
Ghost Scepter
-
Glimmer Cape
-
Force Staff
-
Eul’s Scepter
-
Drum of Endurance
-
Pipe of Insight
-
Rod of Atos
-
Shiva’s Guard
-
Scythe of Vyse
Each of these items helps Dazzle reposition, sustain mana, or keep teammates alive. His goal as a support is simple: stay alive, cast spells, and protect key heroes.
Itemization for Core Dazzle
Core builds center around damage and armor reduction.
A Desolator boosts his physical output. Assault Cuirass adds attack speed and armor reduction for pushing and teamfights. Bloodthorn adds burst damage and a strong silence. Hurricane Pike gives safety and attack range. Octarine Core helps reduce cooldowns, while Arcane Blink lets him cast Shallow Grave and Shadow Wave from a safer distance.
Core Dazzle still relies on good positioning, but with these items he becomes a damage threat that also protects his team.
Practical Tips for Playing Dazzle in Dota 2
Good Dazzle players stay close to their team without standing on the front line. They track enemy disables and avoid being caught first. Silences and stuns can shut him down, so vision and positioning matter.
It helps to cast Shadow Wave often in early skirmishes, both for healing and for the small but steady physical damage around each healed unit. Poison Touch should be used to discourage chases or start fights, depending on the situation.
During teamfights, Shallow Grave should be saved for the moment an ally is about to take lethal damage. Healing items, Shadow Wave, or defensive items like Glimmer Cape should be used right as the Grave ends.
When playing core Dazzle, pushing waves with Shadow Wave becomes a reliable way to stay active and build momentum toward the Scepter timing.
Final Takeaway
Dazzle rewards players who value timing, awareness, and positioning in Dota 2. His abilities let him protect teammates, pressure lanes, and control long fights with armor reduction. Whether played as a support or as a core, he shapes the pace of fights and brings reliable utility throughout the game. With careful play and strong decision-making, Dazzle becomes one of the most consistent and influential heroes in many matchups.
Don't forget to check out Strafe Esports for all the latest news and our X account for the latest content and coverage.
Featured Image Source: Dota 2 Fandom