
Call of Duty Stash House Map — Key Spots and Tactics
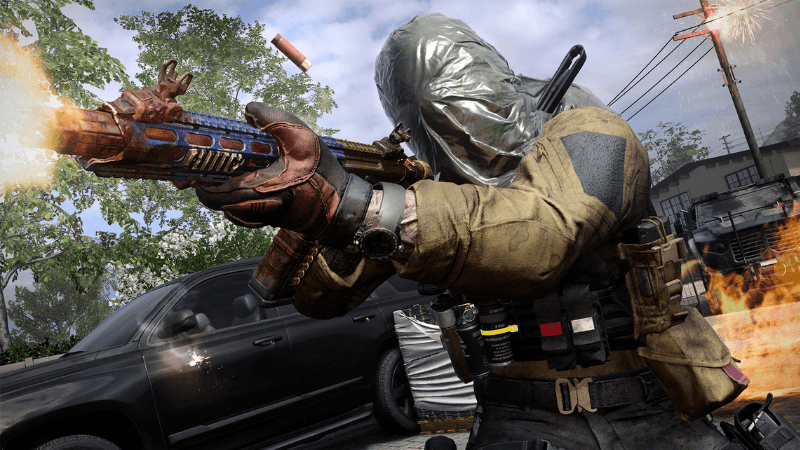
The Call of Duty Stash House Map is one of the smallest and most fast-paced maps in Modern Warfare III. Introduced in the Season Two update, it takes place in a small California residence overflowing with stacks of cash. Designed for 6v6 and Gunfight matches, every corner of this map is a close-quarters challenge.
Players fight inside and around a one-story home that’s surrounded by a driveway, backyard, pool area, and bar. The layout forces constant engagement, rewarding quick reflexes, smart movement, and familiarity with every room and route.
Tactical Layout
Driveway (Northeast Spawn)
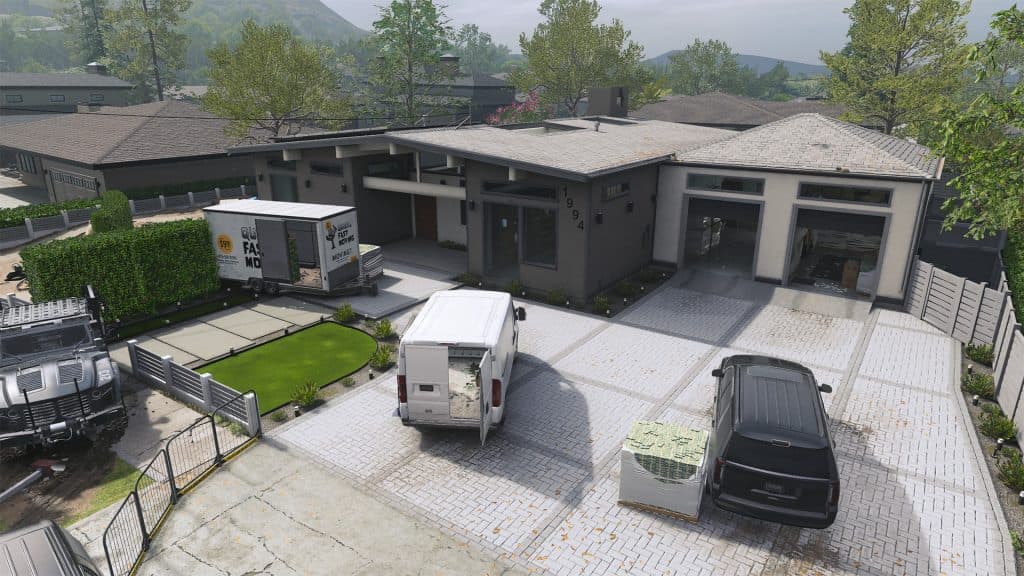
Teams spawning at the driveway start in an open area with several ambush points. Operators can use the van, truck, and curved hedgerow for cover when engaging enemies. These objects provide quick concealment and a chance to land the first shots before opponents react.
The cash crate near the black van offers limited protection but can be used to peek into the garage. Going prone on the van’s roof is a useful tactic for breaking enemy aim and surprising opponents coming from the house. Players can also crouch by the stacked tiles in the landscaping area for cover while engaging enemies from the backyard or bar.
Hot Tub (Southwest Spawn)
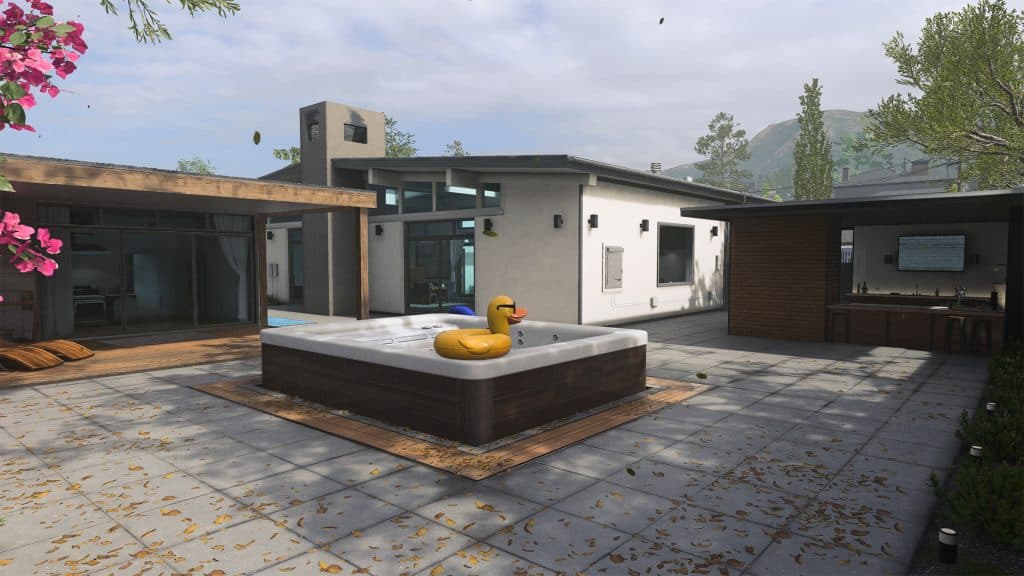
The hot tub spawn point connects several critical areas, including the pool house, backyard bar, and firepit. The hot tub itself is a decent defensive spot — crouching behind its edge offers good cover against gunfire. However, it’s also a common target for grenades, so staying there too long is risky.
From this position, players can move through the pool house for a flank or use the backyard bar for visual control of the house. The pool house bathroom window is a useful vantage point for ambushing enemies near the firepit.
The Central House
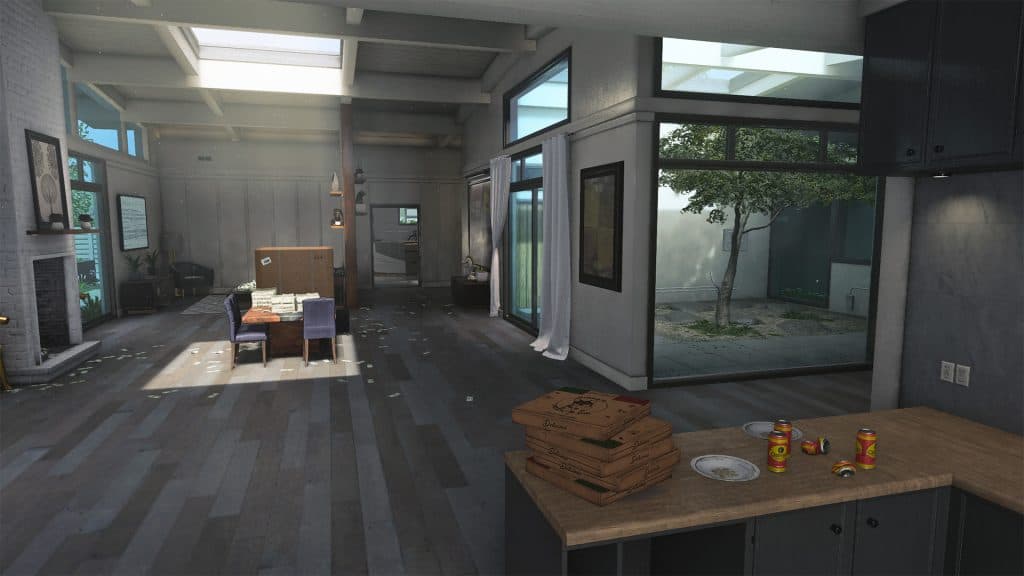
The heart of the Call of Duty Stash House Map is the main residence. Though small, it features multiple connected rooms: the kitchen, dining room, living room, office, garage, bedroom, bathroom, laundry, and atrium.
Each room has multiple entry points, creating nonstop action. Combat often happens in the hallway and atrium where players cross paths moving between spawns. The house is full of angles, windows, and open doors, so awareness is crucial. Learning the layout early helps anticipate where enemies will appear and how to rotate safely.
Gameplay Strategy
Close-Quarters Combat
This map is built for speed. Hip fire and Tac-Stance aiming are highly effective since most fights happen at short range. Strafing while shooting increases your chances of surviving encounters, as a still target is easy to hit.
Weapon Leveling and Camos
Because the map has little downtime, it’s ideal for leveling fast-firing weapons. Shotguns, handguns, and SMGs perform best. Players can quickly gain Weapon XP and complete Camo challenges since engagements happen seconds apart.
Loadout Recommendations
To stay alive longer, use gear that boosts survivability and mobility.
-
Engineer Vest or CCT Comms Vest: Offers two Gear Perks for better customization.
-
EOD Padding + Ghost T/V Camo: Keeps you off the radar and more resistant to explosive damage.
Pair these with Quick-Grip Gloves to switch weapons fast instead of reloading in tight fights.
Key Tactical Areas
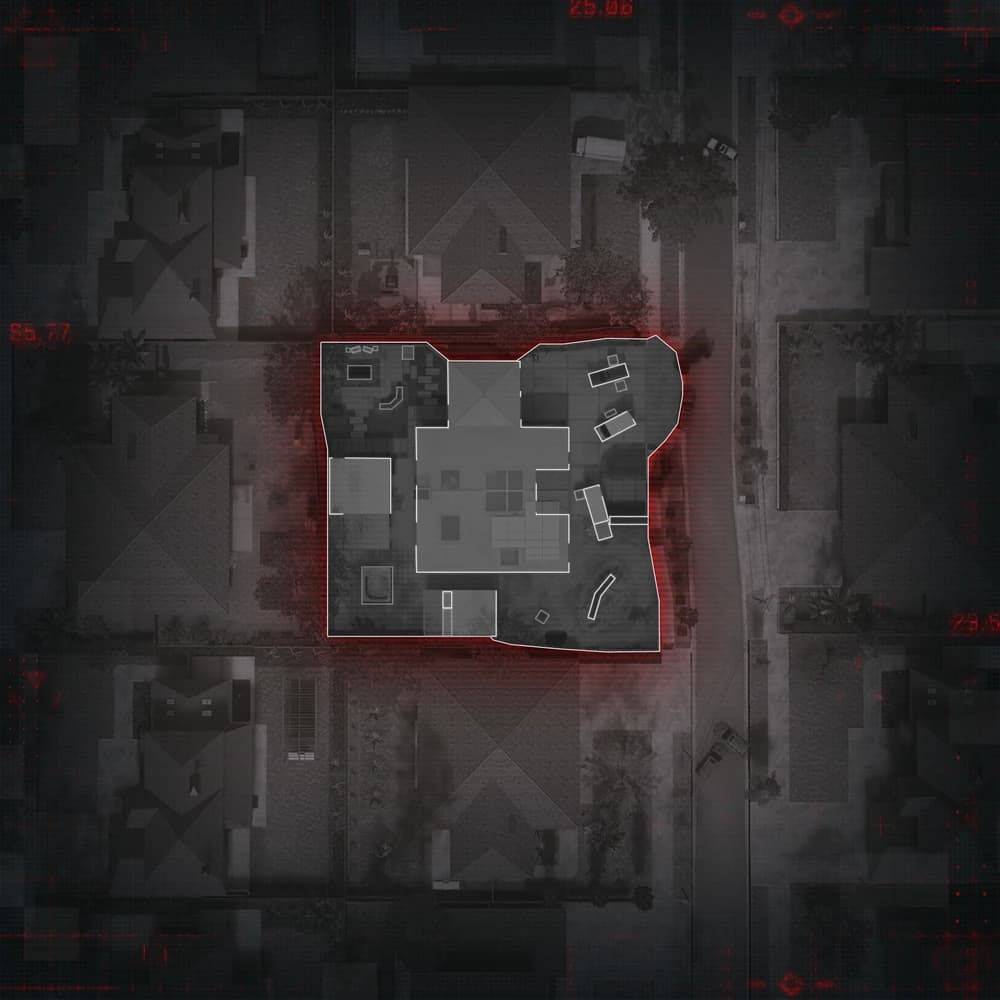
The Laundry Room Advantage
One of the more overlooked rooms is the Laundry Room near the atrium. Closing the door after entering can block enemy detection. Standing on the washing machine gives an elevated angle to fire into the atrium, dining, and kitchen areas.
The Hot Tub Defense
The hot tub works as a temporary hold point. Crouch to use its sides as cover, or go prone to remain unseen by passing enemies. It’s an effective tactic for catching opponents off guard, though it leaves you vulnerable to thrown explosives.
Backyard and Landscaping
Players moving through the backyard or landscaping zones can control outside routes and limit enemy rotations. The backyard bar is especially useful for cutting sightlines and gaining partial control over the house entrance.
Useful Equipment and Killstreaks
Decoy Grenades
Decoy Grenades are valuable on this small map. They send false signals to the enemy radar, making it harder for opponents to identify real threats. They are useful for both defense and offense when trying to create confusion.
Portable Radar
The Portable Radar Field Upgrade almost covers the entire house. It helps track enemies when defending or pushing through rooms. Proper placement can give your team constant awareness of approaching players.
SAM Turret
Because the map is open above, aerial streaks can be a problem. A SAM Turret placed near teammates can take down enemy drones and killstreaks while keeping the ground area safe.
Extra Combat Tips
-
Know the Layout: Learn every window, door, and route in the house. Awareness reduces surprise deaths.
-
Use High-Capacity Magazines: The slight slowdown in aiming is worth it, as you’ll spend less time reloading.
-
Smoke Grenades: Useful for moving through open spaces and breaking line of sight when entering the house.
-
Melee Weapons: Tight spaces make it easier to complete melee camo challenges.
-
Stay Mobile: Movement is everything on Stash House. Staying still turns you into an easy target.
Final Thoughts
The Call of Duty Stash House Map offers a constant stream of action and rewards players who think quickly and stay aggressive. Its compact design removes long sightlines, forcing every engagement to be personal and immediate.
Winning here depends less on long-range precision and more on movement, map awareness, and control of key rooms. Learn the layout, stay alert, and adapt to the flow of combat. Stash House may be small, but mastering it can make a huge difference in your Modern Warfare III matches.
Don't forget to check out Strafe Esports for all the latest news and our X account for the latest content and coverage.
Featured Image Source: callofduty.com